Vscode中的C++多文件编译cmake、json配置
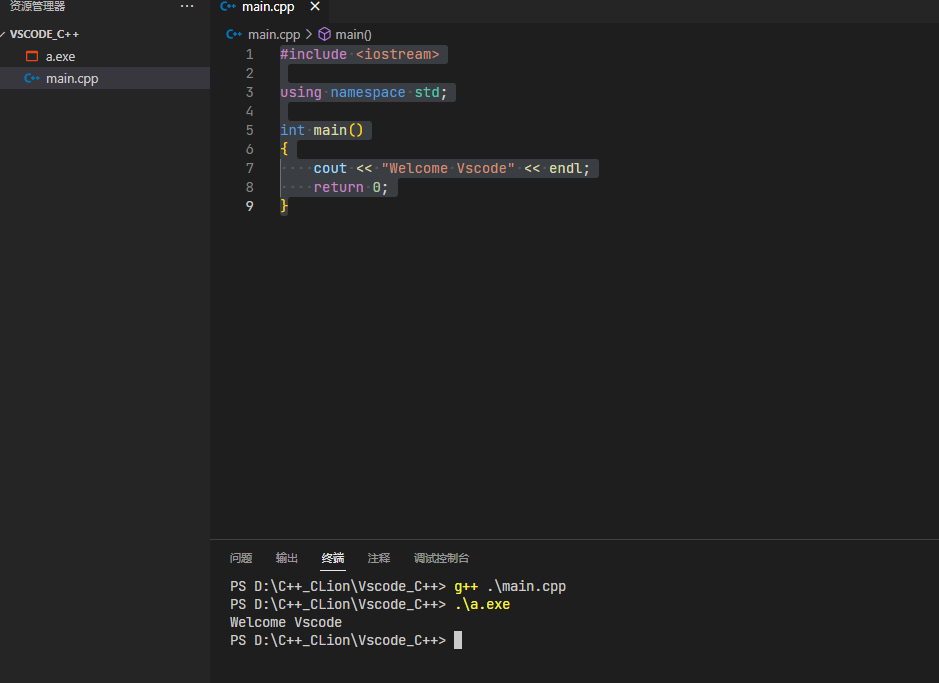
Vscode中编写C++文件
main.c
1
2
3
4
5
6
7
8
9
10
11
12
13
14
15
16
17
18
19
20
21
22
23
24
25
| #include <iostream>
using namespace std;
void swap(int &x, int &y)
{
int temp;
temp = x;
x = y;
y = temp;
}
int main()
{
int a = 10, b = 20;
cout << "Welcome Vscode" << endl;
cout<<"before swap" << endl;
cout<<"a = " << a << endl;
cout<<"b = " << b << endl;
swap(a,b);
cout<<"after swap" << endl;
cout<<"a = " << a <<endl;
cout<<"b = " << b << endl;
return 0;
}
|
新建终端
执行命令
g++ main.cpp
生成可执行文件a.exe
./a.exe
生成可以调试的可执行文件
g++ -g main.cpp -o my.exe
launch.json:用于调试的配置文件
指定语言环境
指定调试类型
……..
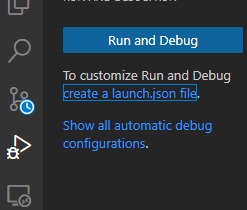
生成launch.json执行调试
C\C++扩展退回到1.8.4版本
调试->Creat a launch.json file->C++(GDB/LDB)->g++.exe
1
2
3
4
5
6
7
8
9
10
11
12
13
14
15
16
17
18
19
20
21
22
23
24
25
26
27
28
29
30
31
32
33
34
| {
"version": "0.2.0",
"configurations": [
{
"name": "g++.exe - 生成和调试活动文件",
"type": "cppdbg",
"request": "launch",
"program": "${fileDirname}\\${fileBasenameNoExtension}.exe",
"args": [],
"stopAtEntry": false,
"cwd": "${fileDirname}",
"environment": [],
"externalConsole": false,
"MIMode": "gdb",
"miDebuggerPath": "D:\\Exe\\mingw64\\bin\\gdb.exe",
"setupCommands": [
{
"description": "为 gdb 启用整齐打印",
"text": "-enable-pretty-printing",
"ignoreFailures": true
},
{
"description": "将反汇编风格设置为 Intel",
"text": "-gdb-set disassembly-flavor intel",
"ignoreFailures": true
}
],
"preLaunchTask": "C/C++: g++.exe 生成活动文件"
}
]
}
|
configurations一个数组储存多个参数
type : 指定编程环境(go node php…)
name :给配置项起一个易理解的名字
request: 指定调试模式(launch/attach)
手动启动应用程序:
开发者手动输入启动命令——>程序运行——>程序不支持打断点
launch启动应用程序
vscode根据配置生成启动命令并运行——>更程序搭配调试器——>程序运行——>支持打断点
编译多个文件
g++ -g .\main.cpp .\swap.cpp -o multfiles
生成 的默认task.json只能编译单个文件
如果需要编译多个需要自己写task.json和launch.json
修改launch.json
1
2
3
4
5
6
7
8
9
10
11
12
| {
"version": "0.2.0",
"configurations": [
{
...
"program": "${fileDirname}\\mult_swap.exe",
...
],
}
]
}
|
task.json执行命令编译,for build before debug
launch.json执行, for debug
task.json的”label”与launch.json的”preLaunchTask”对应
1
2
3
4
5
6
7
8
9
10
11
12
13
14
15
16
17
18
19
20
21
22
23
24
25
26
27
28
29
30
31
32
33
34
35
36
37
38
39
40
41
42
43
44
45
46
47
48
| {
"tasks": [
{
"type": "cppbuild",
"label": "C/C++: g++.exe 生成活动文件",
"command": "D:\\Exe\\mingw64\\bin\\g++.exe",
"args": [
"-fdiagnostics-color=always",
"-g",
"${file}",
"-o",
"${fileDirname}\\${fileBasenameNoExtension}.exe"
],
"options": {
"cwd": "${fileDirname}"
},
"problemMatcher": [
"$gcc"
],
"group": "build",
"detail": "调试器生成的任务。"
},
{
"type": "cppbuild",
"label": "C/C++: g++.exe 生成活动文件 ver(1)",
"command": "D:\\Exe\\mingw64\\bin\\g++.exe",
"args": [
"-fdiagnostics-color=always",
"-g",
"${file}",
"-o",
"${fileDirname}\\${fileBasenameNoExtension}.exe"
],
"options": {
"cwd": "${fileDirname}"
},
"problemMatcher": [
"$gcc"
],
"group": {
"kind": "build",
"isDefault": true
},
"detail": "调试器生成的任务。"
}
],
"version": "2.0.0"
}
|
CMake文件
cmake的定义: ——-高级编译配置工具
当多个人用不同的语言或者编译器开发一个项目,最终要输出一个可执行文件或者共享库((ll, so等等)这时候神器就出现了—-CMake!所有操
作都是通过编译CMakeLists.txt来完成的一简单,为将来处理大型的C/C++/JAVA项目做准备
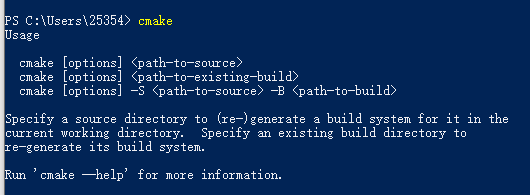
首先windows安装CMake:官网下载
安装过程中主要add Path,打开powershell输入命令cmake结果如下即安装成功
vscode中新建文件CMakeLists.txt
1
2
3
4
| project(MYSWAPCPP)
add_executable(my_cmake_swap main.cpp swap.cpp)
|
ctrl+shiift+p输入CMake->Cmake配置->gcc
如果出现Bad CMake executable . Is it installed or settings contain the correct path (cmake.cmakePath)
解决:【Settings】->【Extensions】->【CMake Tools Configuration】->【CMake:Cmake Path】)指定 cmake.exe 的文件地址。
成功如下
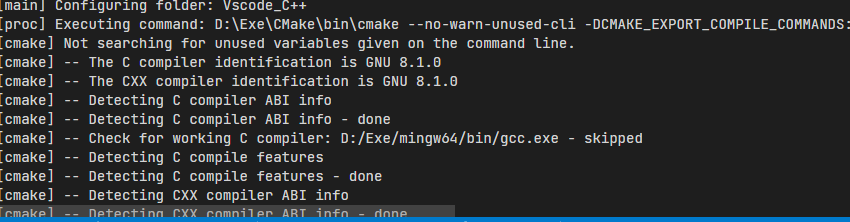
在build目录下输入命令
cmake ..
1
2
3
| -- Configuring done
-- Generating done
-- Build files have been written to: D:/C++_CLion/Vscode_C++/build
|
继续输入命令mingw32-make.exe(运行windows的makefile文件)
(linux为make)

修改launch.json
1
| "program": "${fileDirname}\\build\\swap_file.exe",
|